Exploring Prismacolor Pencil Sets
Why Choose Prismacolor Premier Pencils
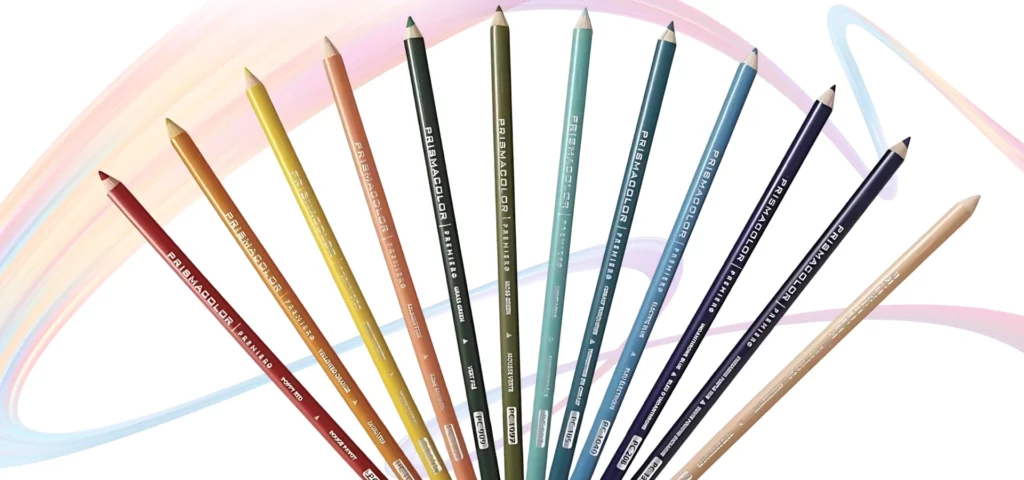
For those with a penchant for elevating their artwork to new heights, Prismacolor Premier coloured pencils are the crème de la crème of art supplies. These pencils boast creamy cores that are ideal for blending, shading, and layering. Whether it’s infusing life into a whimsical unicorn or adding depth to a melancholic landscape, these pencils have got your back (My Art Shop).
The pigments are so vibrant and rich, you’d think they were sourced from a rainbow. Their strong leads can be sharpened to a precision point, ensuring that even the finest details in your masterpiece are on point—literally.
Furthermore, pairing these magnificent tools with an A4 Fabriano 1264 Bristol Pad ensures your artwork pops out in all its intended glory My Art Shop. It’s like giving your art a Renaissance revival but without the ruffs and codpieces.
Different Set Options Available
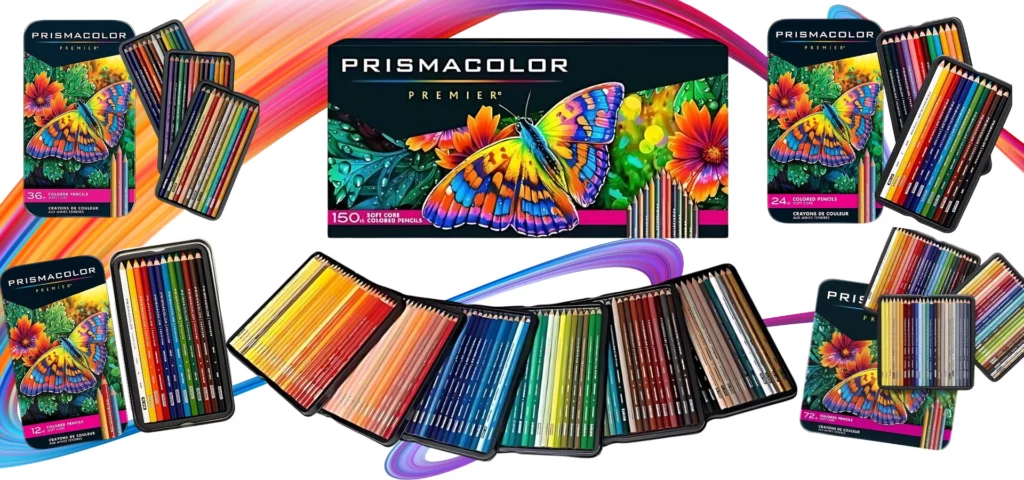
Prismacolor understands that artists come in all shapes, sizes, and levels of obsession with colour. Therefore, they’ve rolled out sets in different sizes to cater to various artistic needs and levels of commitment.
| Set Size | Number of Pencils | Perfect For |
|---|---|---|
| Small | 12 | Beginners or minimalist artists who believe in quality over quantity. |
| Medium | 24 | Casual doodlers who enjoy a bit of variety without losing their heads. |
| Intermediate | 36 | Slightly more committed folks who know their cerulean from their cyan. |
| Large | 72 | Serious artists ready to take on the world one shade at a time. |
| Mega | 150 | Colour fiends who eat, sleep, and breathe art, possibly even in technicolour dreams. |
Each set ensures you have the flexibility to create powerful lines, delicate blends, and silky shadowing. Targets include illustrations, journaling, or even rigorous crafting sessions (My Art Shop).
Regardless of which set you choose, rest assured that Prismacolor Premier coloured pencils will have you gleefully lost in the world of pigments, blending effortlessly between powerful strokes and whisper-thin lines.
Differences in Coloured Pencil Types
Choosing the right coloured pencils can be a tad bewildering, especially with so many splendid options like Prismacolor Premier, Faber-Castell, and Crayola vying for an artist’s affection. Let’s unravel the differences between coloured pencil types to help you make an informed decision that makes your artistic heart sing.
Wax vs. Oil-based Pencils
The great debate in the coloured pencil world is often between wax-based and oil-based pencils. Each has its own charm and practical applications.
Wax-based Pencils:
These are beloved for their ease of blending and layering. They allow for smooth transitions between colours, making them perfect for detailed work and gradients. Wax-based pencils are typically softer and easier to blend, making them a favourite among beginners. On the flip side, they are prone to a phenomenon called “wax bloom,” where a hazy film can form over the artwork.
Oil-based Pencils:
These pencils are admired for their durability and resistance to wax bloom. They have a firmer lead, which can feel a bit dry compared to the buttery feel of wax-based pencils, but they hold a point much longer. Oil-based pencils require a bit more effort to blend but excel at maintaining sharp, clean lines. They’re often preferred by professionals who seek precision and fine detail in their work.
| Attribute | Wax-based Pencils | Oil-based Pencils |
|---|---|---|
| Blending | Easy | Requires more effort |
| Durability | Prone to wax bloom | Resistant to wax bloom |
| Application | Smooth, buttery | Firm, dry |
| Best for | Beginners | Professionals |
For those leaning towards the fabulous Prismacolor Premier Coloured Pencils, you’ll be pleased to know they are wax-based and renowned for their magnificent blending and layering capabilities (Interwell Stationery).
Artist-grade vs. Student-grade
Before diving headfirst into a set of expensive coloured pencils, it’s wise to understand the differences between artist-grade and student-grade pencils.
Artist-grade Pencils:
These pencils boast higher concentrations of pigment, providing intense and vibrant colours. They offer superior lightfastness, meaning your artwork won’t fade over time. Artist-grade pencils often have cores that are less prone to breaking and shattering, making them a reliable tool for professionals who demand the best.
Student-grade Pencils:
These are more affordable and still offer decent quality for beginners and casual artists. They contain a lower pigment concentration, which can result in less vibrant colours. While they are not as durable as their artist-grade counterparts, they provide an excellent gateway into the world of coloured pencils without breaking the bank.
| Attribute | Artist-grade Pencils | Student-grade Pencils |
|---|---|---|
| Pigment Concentration | High | Moderate |
| Lightfastness | Superior | Average |
| Durability | High | Moderate |
Prismacolor Premier Pencils fall under the artist-grade category, offering exceptionally rich pigments that make them a top choice for serious artists (SarahRenaeClark).
Now that you’re armed with the knowledge of wax versus oil-based and artist-grade versus student-grade, you can confidently choose the best prismacolor premier coloured pencils to elevate your artistic creations. For more insights on how Prismacolor stacks up against other brands, take a look at our comparison with Crayola pencils.
Prismacolor vs. Crayola Pencils
When it comes to choosing the right coloured pencils, artists often find themselves comparing Prismacolor Premier coloured pencils with their trusty Crayola counterparts. Below we explore how these two brands differ, particularly in terms of layering and blending capabilities and their suitability for various artistic needs.
Layering and Blending Capabilities
Layering and blending are essential techniques for artists aiming to add depth and richness to their work. The layering and blending capabilities of coloured pencils can make a significant difference in the final outcome of an artwork.
Prismacolor pencils are renowned for their superior layering and blending capabilities. Artists using Prismacolor pencils can achieve smoother blends and seamless layers much faster compared to Crayola pencils. This is primarily because Prismacolor pencils contain more pigment and fewer fillers and binding agents (Carrie Lewis).
| Capability | Prismacolor Premier | Crayola |
|---|---|---|
| Layering | Smooth, easy and fast | Difficult, especially with heavy pressure |
| Blending | Seamless blends, richer colours | Limited blending, can be streaky |
| Pigment Concentration | High (More pigment, fewer fillers) | Lower (More fillers and binders) |
This makes Prismacolor pencils ideal for artists who like to play with multiple layers and complex shading techniques. On the other hand, Crayola pencils are quite effective if you’re looking to lay down a single layer of saturated colour but struggle when building up layers (Carrie Lewis).
Suitability for Different Artistic Needs
Artists have different requirements based on the type of work they create, so understanding the suitability of these pencil brands for various artistic needs is crucial.
Prismacolor Premier Pencils
Prismacolor Premier coloured pencils are designed for serious artists looking to create high-quality, professional-grade artwork. These pencils are available in sets of varying sizes, such as 12, 24, 36, 72, and even 150 colours (MyArtShop). They are excellent for:
- Illustration and Fine Art: The high pigment concentration and smooth blending make them ideal for detailed illustrations and fine art.
- Journaling and Crafting: The rich colours add a professional touch to journals and crafts.
- Mixed Media: They work well with other mediums like watercolour or ink.
Crayola Pencils
Crayola pencils, known primarily as student-grade supplies, are suitable for:
- Basic Colouring: Ideal for hobbyists or those engaging in simple colouring activities.
- Beginners: Suitable for beginners, especially children, who are learning to colour.
- Less Complex Projects: Best for projects that do not require extensive layering or blending.
Understanding the differences between Prismacolor and Crayola pencils helps artists choose the best tool for their artistic needs. For those serious about their craft, investing in Prismacolor Premier coloured pencils can elevate their artwork, providing richer colours and smoother blends. If curious about maintaining and maximizing the quality of your artwork with these pencils, check out our section on maintaining quality in artwork.
Explore more topics on coloured pencils:
- Layering for Depth and Texture
- Preventing Smudging and Transferring
- Artist Selections and Recommendations
Techniques with Prismacolor Pencils
Prismacolor Premier coloured pencils are every artist’s dream come true, offering unmatched quality and smoothness. Let’s explore some artistic techniques specifically tailored for these delightful pencils.
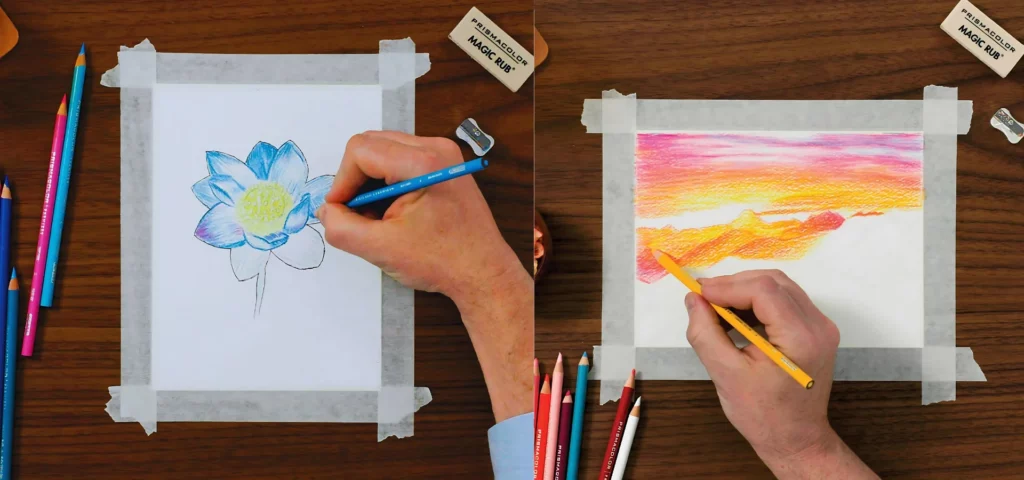
Layering for Depth and Texture
Layering with Prismacolor Premier coloured pencils can transform your artwork from flat to fabulously rich and textured. This technique involves gradually building up layers of colour to achieve depth and complexity.
Step-by-step guide to layering with Prismacolor Premier pencils:
- Laying the Foundations:
- Begin with light pressure to apply the base layer.
- Use broad, even strokes to cover the area.
- Defining & Applying Mid-Layers:
- Gradually increase pressure as you add mid-layers of different colours.
- Vary your strokes’ direction to prevent streaks and ensure even coverage.
- Applying Highlights and Final Details:
- Use a sharp pencil to add highlights and intricate details.
- Clean the tips of lighter coloured pencils before highlighting to avoid colour transfer My Art Shop.
This method ensures that every stroke influences the next, creating a seamless blend of hues. For an in-depth layering tutorial, check out Step By Step Art.
Utilizing Blender Pencils for Smooth Blends
For superior blending, using a Prismacolor Blender Pencil is akin to discovering the Holy Grail of coloured pencil artistry. These blender pencils enable you to meld colours seamlessly, eliminating harsh lines and creating smooth gradients.
Blending Techniques:
- Burnishing:
- This involves applying heavy pressure with the Prismacolor Blender Pencil, mixing multiple colours into a polished, even tone.
- Start by laying down varied shades, then use the blender pencil to unite them into one cohesive colour.
- Colourless Blending:
- Prismacolor Blender Pencils contain no pigment, meaning they won’t alter the original colours but will help smooth out transitions.
- Apply multiple layers of colour lightly, then follow with the blender pencil for a polished finish.
Blender pencils are particularly useful for creating custom shades and ensuring that the depth produced by layering isn’t lost. Furthermore, maintaining the quality of your artwork is essential. Tips include sharpening precision leads regularly and preventing smudging by using blending and layering techniques mindfully.
By mastering these techniques, one’s artwork with Prismacolor Premier coloured pencils will not only showcase vibrant layers but also achieve the smooth, sophisticated blends vital for professional-grade pieces.
Picking the Right Colour Combinations
Choosing the right colour combinations with Prismacolor Premier coloured pencils can elevate your artwork to the next level. Let’s dive into the art of blending for custom shades and get some recommendations from seasoned artists.
Blending for Custom Shades
Blending is akin to conjuring up your very own magical colours. It’s perfect for creating custom hues, capturing subtle variations, and achieving lifelike details. With Prismacolor Premier Soft Core coloured pencils, you can blend to your heart’s content.
When blending, follow these steps:
- Layering: Start light and gradually build up colour with gentle strokes. Layering lighter colours on top of darker ones can help create depth and prevent muddy colours.
- Burnishing: This technique involves using heavy pressure to blend colors. A Prismacolor Premier Blender Pencil can smooth out edges, creating seamless transitions. If you don’t have a blender pencil, a white coloured pencil works wonders too.
- Clean Tips: Always clean the tips of lighter pencils before highlighting over darker areas to avoid unsightly colour transfer.
- Protecting Artwork: Place a piece of paper under your drawing hand to prevent smudging from sweat or oils. (My Art Shop)
Here’s a table showcasing popular blending combos:
| Base Colour | Blending Colour | Resulting Shade |
|---|---|---|
| Light Blue | Dark Blue | Deep Azure |
| Red | Yellow | Vibrant Orange |
| Green | Yellow | Lush Lime |
| Orange | Red | Rich Coral |
Artist Selections and Recommendations
Creating a palette can be daunting, so consider the selections and advice from seasoned artists.
- Basic Essential Set: The foundation set for any beginner consists of primary colours (red, blue, yellow), along with secondary hues (green, orange, purple). This set offers versatility for blending.
- Landscapes: For nature-inspired artwork, artists recommend earthy tones; browns, greens, and sky blues are essential.
- Portraits: For realistic skin tones, a good range includes peach, ochre, sienna, and umber. Adding cooler tones like blues and purples can enhance shadows.
- Fantasy Art: Embrace vibrant and unusual colours. Purples, magentas, and neons can spark imagination and creativity.
Top picks from artists:
- Red, Yellow, Blue: The holy trinity for blending custom colours.
- Burnt Sienna, Peach, White: For smooth skin gradients.
- Green, Olive, Yellow Ochre: Ideal for lush greenery in landscapes.
- Magenta, Cyan, Lime: Creative shades for fantasy elements.
When blending colours, it’s also recommended to have a go at:
- Testing combinations on scrap paper.
- Applying a light touch first to see how pencils interact.
- Layering gradually to avoid creating a wax build-up too quickly.
Blending with Prismacolor Premier Soft Core coloured pencils enhances the creative process, letting you experiment while achieving professional results.
For more insights on using coloured pencils to their fullest potential, consider exploring topics like [maintaining quality in artwork], [layering and blending capabilities], and techniques for [preventing smudging and transferring].
Maintaining Quality in Artwork
Maintaining the quality of one’s artwork with Prismacolor Premier coloured pencils involves preventing pesky smudges and ensuring precision sharpening of those buttery-soft leads. Here’s how they can keep their masterpieces impeccable.
Preventing Smudging and Transferring
Ah, the dreaded smudge: the enemy of all coloured pencil aficionados. To prevent smearing and colour transfer with Prismacolor Premier coloured pencils, artists should place a piece of paper under their hand while drawing. This simple trick prevents sweat and oils from the hand mingling with the artwork (My Art Shop).
For extra protection:
- Avoid resting the hand directly on the drawing surface.
- Use a fixative spray to lock in those gorgeous hues.
- Opt for a high-quality paper like the A4 Fabriano 1264 Bristol Pad, which provides a sturdy surface resistant to smudging (MyArtShop).
Sharpening Precision Leads
Prismacolor Premier coloured pencils boast a soft, buttery core, ideal for blending but notoriously delicate for fine details. The core doesn’t hold a sharp point for long and can be fragile compared to sturdier brands like Faber-Castell Polychromos (SarahRenaeClark).
Here’s how they can sharpen those precious leads with care:
- Use a high-quality sharpener: Invest in a sharpener specifically designed for coloured pencils. Prismacolor’s own sharpener works well, but any high-quality sharpener with a gentle blade will do.
- Take it slow: Sharpen pencils slowly to avoid breakage.
- Rotate the sharpener, not the pencil: It’s tempting to twist the pencil, but rotating the sharpener ensures an even, sharp point.
- Use a knife for precision: For those who are bold (and careful), a craft knife can offer a custom-sharpened point.
To illustrate:
| Technique | Effectiveness | Recommended Tools |
|---|---|---|
| Using a pencil sharpener | High | Prismacolor Sharpener |
| Sharpening slowly | High | Any high-quality sharpener |
| Rotating the sharpener | Medium | Manual sharpeners |
| Using a craft knife | High (if careful) | Craft knife |
Careful sharpening ensures the pencils remain precise instruments of artistic delight. For more on achieving smooth blends and transitions, check out the best uses for a Prismacolor Premier Blender Pencil.
By employing these techniques, they ensure their Prismacolor Premier coloured pencils remain sharp, vibrant, and ready to bring their artistic visions to life without interruption.