The World of Tim Holtz Alcohol Ink Accessories
Introduction to Tim Holtz Alcohol Inks
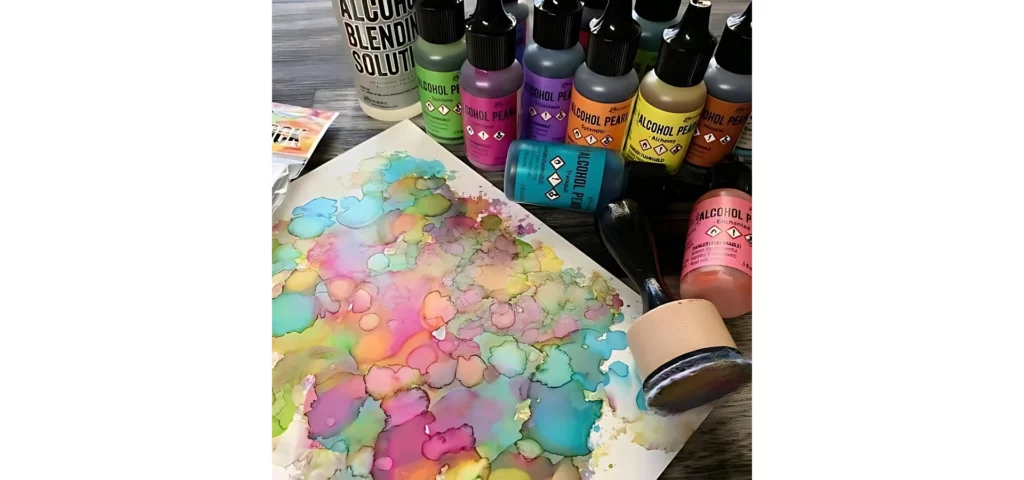
Ah, Tim Holtz Alcohol Inks—a splash of vibrant madness in a bottle. For those unacquainted with these magical elixirs, they’re the go-to choice for artists looking to create colourful, dynamic pieces. Tim Holtz, a name synonymous with creativity, offers a fantastic range of alcohol inks that are highly pigmented and fast-drying. They work wonders on non-porous surfaces, giving artists the freedom to experiment with colour blending and layering.
Exploring Alcohol Ink Accessories
When diving into the world of Tim Holtz Alcohol Inks, one quickly realizes that the inks themselves are just one piece of the puzzle. Equally important are the accessories that accompany them. The right tools can make your artistic journey smoother and more enjoyable. Let’s explore some essential accessories you might want to add to your toolkit.
Tim Holtz Alcohol Ink Applicator Tool
The Tim Holtz Alcohol Ink Applicator Set is a must-have for any serious alcohol ink artist. This set includes the applicator tool and multiple felt pads, making it easy to swap out colours without the fuss. The ergonomic design ensures a comfortable grip, so your hands don’t cramp up in the middle of an artistic breakthrough.
Tim Holtz Alcohol Lift Ink Pad
One of the newer additions to the Tim Holtz lineup is the Alcohol Lift Ink Pad. (My Art Shop). This magical pad allows you to lift and rework your alcohol ink designs, adding an extra layer of creativity to your projects. Perfect for those moments when you want to add intricate details or correct those little oopsies.
Tim Holtz Alcohol Ink Applicator Set
The Tim Holtz Alcohol Ink Applicator Set is your best friend in the wild world of alcohol ink art. This gem includes the tools you need to paint and create works of art with Tim Holtz Alcohol Inks. The kit includes 1 Mini Mister and 3 fine detail, synthetic brushes. Brush sizes include #2 & #8 Round and #6 Flat brushes (My Art Shop).
For more tips and insights from seasoned alcohol ink artists, check out what creatives like Jessica Young, Rachel Allen, and others have to say (Happilyevercrafty).
By exploring the versatile range of Tim Holtz alcohol ink accessories, you’re on your way to conquering any art challenge that comes your way. So go ahead, unleash your inner artist and make your mark one vibrant splash at a time!
Creating Vibrant Backgrounds
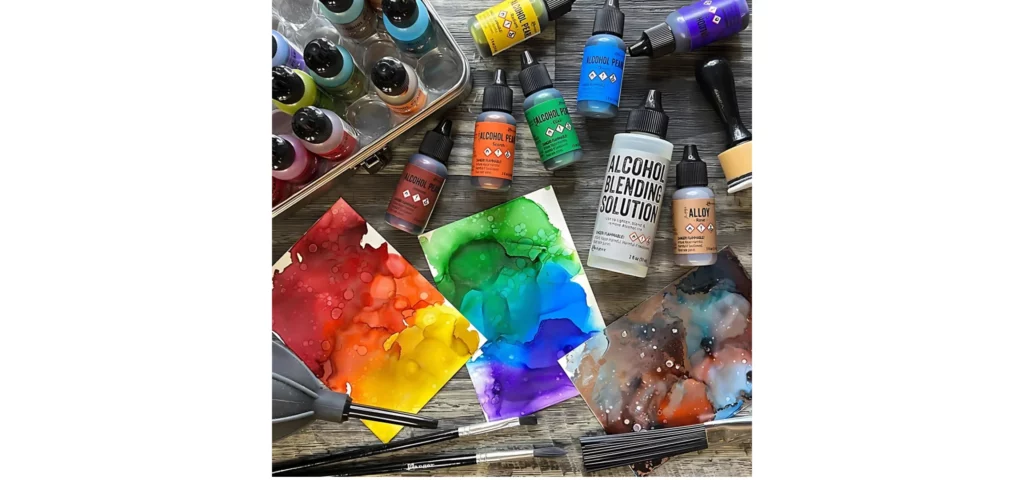
Creating vibrant backgrounds is a delightful endeavour that can bring life and colour to your art projects. Here we delve into the essential tools and techniques to help you achieve stunning results with alcohol inks.
Blending Tools and Techniques
Blending is key to creating those captivating backgrounds. With the right tools and techniques, you can blend colours seamlessly for a vibrant finish. Here are some popular blending tools for alcohol inks:
- Tim Holtz Alcohol Ink Applicator Tool: Known for its versatility (Coya Sauce).
- Blending Brushes: Perfect for softer, more gradual transitions.
- Air Blowers: Helps to move the ink around and create fluid designs.
Here’s a quick guide on how to blend your alcohol inks like a pro:
- Select Your Colours: Choose a palette that excites you.
- Prepare Your Surface: Ensure it’s clean and ready for the inks.
- Apply The Ink: Use your chosen blending tool to apply and move the ink around.
- Blend: Mix and blend the colours using your tool of choice.
- Add Isopropyl Alcohol: Helps to dilute and blend the colours further for softer transitions.
Utilizing Alcohol Ink Applicator Tools
The magic behind flawless alcohol ink art often lies in the tools used. One must-have tool is the Tim Holtz® Adirondack® Alcohol Ink Applicator.
Tim Holtz® Adirondack® Alcohol Ink Applicator Tool
The Tim Holtz Alcohol Ink Applicator Tool, paired with small pieces of felt, is perfect for adding inks and a touch of isopropyl alcohol to create stunning, colourful backgrounds, especially useful for cardmaking (Coya Sauce).
To effectively utilise this tool:
- Attach the Felt: Attach a small piece of felt to the bottom of the applicator.
- Add Ink and Isopropyl Alcohol: Apply a few drops of your chosen ink colours and a bit of isopropyl alcohol.
- Dab and Blend: Dab onto your surface to create a colourful and vibrant background.
- Reapply as Needed: Reapply inks and alcohol as needed to achieve the desired intensity and blend.
Using the Tim Holtz applicator tool provides even coverage and ease of use, making it a fantastic addition to any artist’s toolkit. Keep experimenting with different techniques and combinations to discover what works best for your creative vision.
Feel free to explore more about alcohol ink tools and blending techniques for achieving those vibrant backgrounds that can truly make your artwork pop!
Tips and Insights from Alcohol Ink Artists
When diving into the world of alcohol ink art, artists have an array of quirky tips and tricks to offer. These insights can transform your next project from a simple splash of color to a veritable masterpiece.
Artist Recommendations and Tips
Artists like Taylor Pendleton are aficionados of the alcohol ink applicator tool, citing it as essential for crisp, vibrant creations (Happily Ever Crafty). Here are some gems from the experts:
- Taylor Pendleton: “The alcohol ink applicator tool is a must! Use it with felt pads for intricate designs.”
- Jessica Young: “For an added wow-factor, incorporate metallic alcohol inks with your applicator tool.”
- Rachel Allen: “Mixing a bit of isopropyl alcohol with your inks allows for more fluid transitions and unique patterns.”
Other revered artists such as Lone Zimino and June Corstorphine also recommend experimenting with various pressures and motions to discover the full versatility of your alcohol ink applicator tool.
| Artist | Recommendation |
|---|---|
| Taylor Pendleton | Use felt pads with the applicator tool for intricate designs. |
| Jessica Young | Incorporate metallic inks for added wow-factor. |
| Rachel Allen | Mix isopropyl alcohol for fluid transitions. |
| Sabrina Epton | Experiment with pressures and motions for different textures. |
Utilizing Precision Applicators
Precision applicators are another favourite among artists. While the standard alcohol ink applicator tool is great for larger areas, precision tools excel in adding fine details and accents. They’re particularly indispensable for tasks that require a steady hand and a keen eye for detail.
- Karen Louise: “Precision applicators are fantastic for adding those tiny dots and lines that make your art pop.”
- Hannah Sink: “Combine precision applicators with stencils for crisp, defined shapes.”
Using precision applicators can elevate your artwork, especially in projects where meticulous detailing is key.
| Artist | Usage of Precision Applicators |
|---|---|
| Karen Louise | Ideal for adding tiny dots and lines. |
| Hannah Sink | Use with stencils for crisp shapes. |
| Kari Hertzog | Great for detailed accents and highlights. |
Remember, the right tools and techniques can make a world of difference in your alcohol ink journey. Whether you’re following the whimsical recommendations of artists or dabbling with precision applicators, your adventure with Tim Holtz alcohol ink accessories is bound to be a vibrant and exciting one.
Level Up Your Alcohol Ink Art
Elevate your artistic game with advanced techniques and tools that will make your artwork truly shine. Let’s dive into using metallic alcohol inks for added dazzle and the crucial steps for sealing and preserving your masterpieces.
Sealing and Preserving Alcohol Ink Art
To protect your art from the cruel world (fading and general mishaps), sealing your prints with varnish or resin is vital. This not only prevents fading due to sunlight exposure but also adds longevity by creating a protective layer or a glossy finish that enhances colours.
Options for Sealing Alcohol Ink Art
- Varnish: Provides a protective layer. Ideal for those who love a matte or satin finish.
- Resin: Adds a glossy finish, enhancing colours and adding depth to the artwork.
Step-by-Step Guide to Sealing Your Art:
- Prepare Your Art: Ensure your artwork is dry.
- Choose Your Sealer: Decide between varnish or resin based on your desired finish.
- Apply in a Well-Ventilated Area: For resin, make sure to mix it according to the manufacturer’s instructions.
- Apply Evenly: Use smooth, even strokes and avoid bubbles.
- Allow to Dry: Follow the drying times as recommended by the product.
By following these steps and using high-quality Tim Holtz alcohol ink tools and accessories, your art will not only look spectacular but also stand the test of time. Happy inking!