Beginning Your Lino Printing Journey
Diving into the world of lino printing can be both exhilarating and a tad perplexing. But fear not, for embarking on this artistic voyage just requires the right tools and a dash of enthusiasm. Let’s start with the essentials to get those creative juices flowing!
Exploring Lino Tools and Materials
When embarking on a linocut adventure, it’s essential to have the right tools and materials to elevate your artistic creations. In this section, we’ll explore key lino printing supplies such as the Prime Art Ink Roller, Brayer Techniques, and other popular block printing supplies.
Prime Art Ink Roller
The Prime Art Ink Roller, also known as a brayer, is a fundamental tool in lino printing. A 6″ Prime Art Ink Roller (MyArtShop). This tool ensures even distribution of ink over the lino block, making it a must-have for any printmaker’s toolkit.
Prime Art Ink Rollers are especially known for their durability and precision. The roller’s smooth surface ensures that the ink is applied uniformly, thus enhancing the final print. Here’s a quick guide on the roller’s specifications:
| Feature | Specification |
|---|---|
| Roller Width | 6 inches |
| Material | Soft Rubber |
| Purchase Location | MyArtShop |
For variety, the art world has other options, like the Speedball Soft Rubber Brayer, which is also well-loved by artists.
Brayer Techniques
Versatility is the name of the game when using a brayer. Take inking your projects to a new level with these quirky techniques:
- Inking the Brayer: Roll the brayer back and forth in ink to evenly coat it.
- Continuous Motion: Apply the ink in continuous, even strokes over the lino block.
- Creating Effects: Achieve different textures and marks.
- Using Stencils and Masks: Combine with stencils for unique designs.
Top tips for using a brayer:
- Avoid harsh lines by keeping the pressure consistent.
- Experiment with blending different inks for a gradient effect.
- Always clean your brayer thoroughly after use to prevent ink buildup (My Art Shop).
Popular Block Printing Supplies
Apart from the trusty ink roller, numerous other supplies are indispensable for lino printing enthusiasts. Here’s a shortlist of popular block printing essentials:
| Supply | Description |
|---|---|
| Caligo Safe Wash Relief Inks | Eco-friendly inks that clean up with soap and water (Boarding All Rows) |
| Blick Battleship Gray Linoleum | Durable linoleum, great for detailed cuts (Boarding All Rows) |
| Speedball Soft Rubber Brayers | High-quality brayers for smooth inking (My Art Shop) |
| Power Grip Carving Tools | Ergonomic tools for precise carving (My Art Shop) |
| Speedball Fabric Block Printing Inks | Perfect for printing on fabric; vibrant and long-lasting (Boarding All Rows) |
Proper tools and high-quality materials are essential for creating beautiful lino prints. With the right equipment, your creative potential is limitless. So, dive into the colourful world of lino printing and let your imagination run wild!
Selecting Lino Blocks and Carving Tools
When it comes to lino printing, the right supplies can make all the difference between a masterpiece and a colourful mess. Let’s dive into the world of lino blocks and carving tools, shall we?
Lino Block Options
Not all lino blocks are created equal. Here are some popular choices:
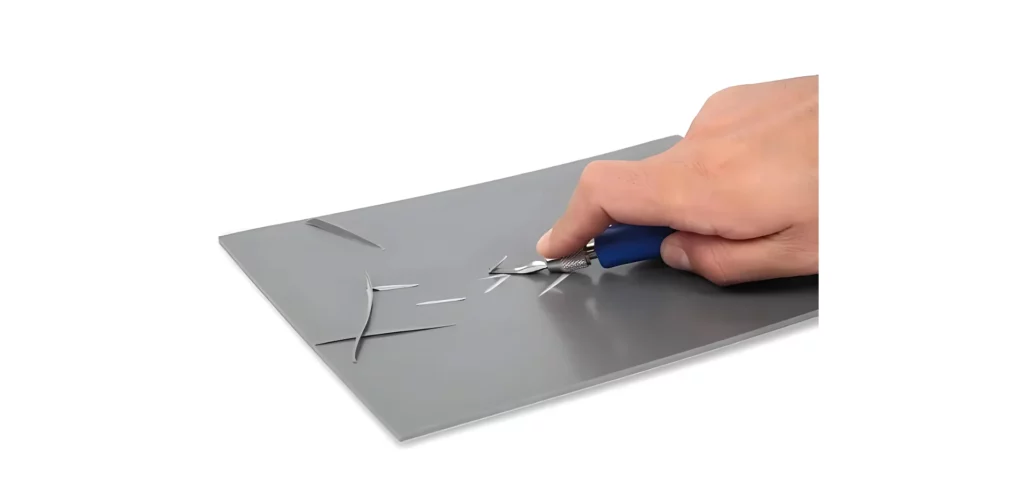
Blick’s Ready Carve Blocks
Blick’s Ready Carve Blocks are the bees’ knees for soft cut lino printing. These blocks boast a grey surface with a white underneath, providing a visible contrast when carving (KateMichelleDesign). This feature is a lifesaver, preventing the dreaded misstep while carving.
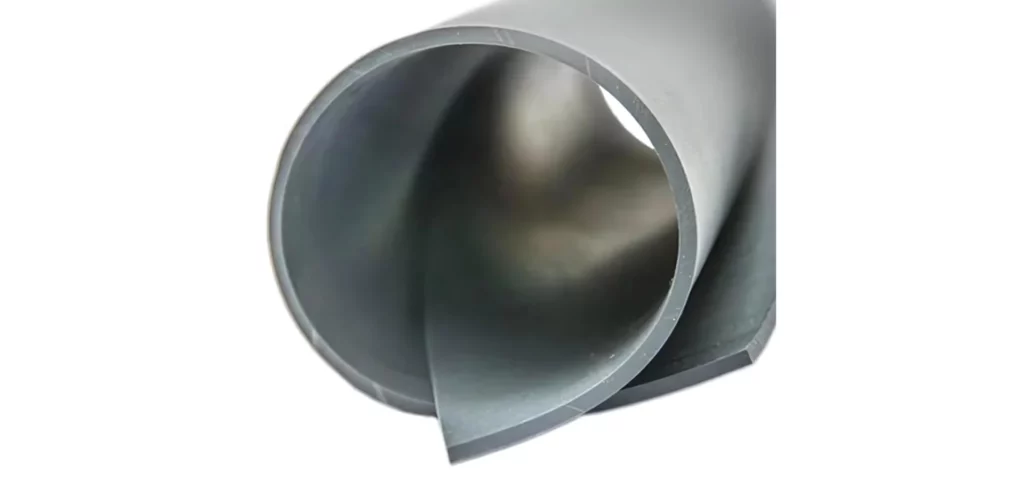
Battleship Grey Linoleum Blocks
For the true connoisseurs, unmounted battleship grey linoleum blocks are highly recommended. Purchasing in large sizes like 18″ x 24″ and then cutting them down to your desired size is the way to go (Boarding All Rows). These blocks are sturdy and perfect for those intricate designs.
| Lino Block Type | Key Features | Recommended Use |
|---|---|---|
| Blick’s Ready Carve Blocks | Grey surface, white underlayer | Soft cut lino printing |
| Battleship Grey Linoleum Blocks | Durable, versatile size options | Intricate, detailed designs |
Carving Tool Varieties
Choosing the right carving tools is crucial for turning your lino block into a piece of art. Here are some of the crowd favourites:
Speedball Linoleum Cutter
Speedball Linoleum Cutters are often the introductory gateway into the world of lino carving tools. These cutters are versatile and come with multiple blade options, making them perfect for beginners.
Power Grip Carving Tools
From the Land of the Rising Sun come the Power Grip Carving Tools by Mikisyo. These simple tools feature sharpenable steel blades and a variety of “U” and “V” gouges, a small straight chisel, and a skew knife (Boarding All Rows). These make a noticeable upgrade from the Speedball cutter.
Pfeil Palm Carving Tools
For those willing to splurge for quality, the Pfeil Palm Carving Tools are Swiss-made gems. With wooden mushroom or pear-shaped handles, these tools fit comfortably in the palm and allow for smoother carving with less effort (Boarding All Rows).
| Carving Tool Type | Key Features | Recommended For |
|---|---|---|
| Speedball Linoleum Cutter | Multiple blade options | Beginners |
| Power Grip Carving Tools | Sharpenable steel blades, various gouges | Intermediate users |
| Pfeil Palm Carving Tools | High-quality, ergonomic handles | Advanced users seeking high precision |
By exploring the variety of lino blocks and carving tools available, artists can elevate their lino printing game, making sure every carve and print turns out just right.
Inking and Printing Techniques
In the world of linocut printmaking, mastering the art of inking and printing can elevate your creations from “meh” to museum-worthy. Let’s dive into these techniques, so you can wield your lino printing supplies like a pro.
Inking your Lino Block
Applying ink to a lino block is an art in itself, and getting it just right is crucial for a successful print. Here’s how to do it without turning your studio into a crime scene:
- Choose Your Ink: Opt for relief printing ink because it’s thicker and more viscous, making it a dream to roll onto the block (Jackson’s Art). Water-based and water-soluble inks are popular due to their easy cleanup with soap and water.
- Get an Inking Slab: Use an inking slab, glass chopping board, or acrylic sheet. Pour a dollop of ink (about the size of a 50c coin) and spread it out evenly with your roller.
| Tool | Description |
|---|---|
| Inking Slab | Surface to spread ink evenly |
| Glass Chopping Board | Alternative to an inking slab |
| Acrylic Sheet | Another usable surface |
- Roll Out the Ink: Using a soft rubber roller, spread the ink evenly until you hear a velvety “ssst-ssst” sound (Jackson’s Art). This indicates an even layer.
- Ink the Lino Block: Roll the inked roller over your lino block in multiple directions to ensure full coverage of the carved details. You want an even layer without overloading the block.
Printing your Designs
Now that your lino block is properly inked, it’s time to transfer your masterpiece onto paper. Follow these steps to achieve a crisp, clean print:
- Prepare Your Paper: Choose a high-quality paper. Lightly dampen it slightly to allow better ink absorption.
- Align and Place: Position your inked lino block where you want the print on the paper. Gently press it down to avoid smudging.
- Use a Baren or Spoon: Apply even pressure using a baren or the back of a wooden spoon to transfer the ink from the block to the paper (My Art Shop). Rub in circular motions, making sure to cover the entire surface of the block.
- Lift and Admire: Carefully lift the paper off the block, starting from one corner, and voilà! Your design should be beautifully printed.
- Dry Completely: Allow your prints to dry completely before stacking them. Impatience may lead to tragic smudges.
Inking and printing require a steady hand and a bit of patience, but with these techniques, your journey into the art of linocut printmaking will be a rewarding one.
Let’s dig into the nitty-gritty of lino printing supplies, whether you’re deciphering the labyrinth of lino cutting tools, mastering carving techniques, or conquering the final frontier of inking and printing.
Lino Cutting Tools and Supplies
Having the right tools in your arsenal can make the world of lino printing an absolute blast. Various tools are available, tailored to specific needs.
Carving Tools
Whether you’re aiming for a delicate detail or a bold statement, there’s a tool for every job. Carving tools typically come in two primary shapes:
- U-shaped gouges: Ideal for creating larger, bolder marks.
- V-shaped cutters: Perfect for thin, precise lines.
Here’s a quick breakdown of popular choices:
| Tool Type | Purpose | Availability |
|---|---|---|
| U-shaped gouge | Larger marks | Beginner sets, advanced woodcarving tools |
| V-shaped cutter | Thin, consistent lines | Interchangeable blades, professional kits |
Techniques for Lino Carving
To make the most out of your lino printing adventure, mastering carving techniques is paramount.
- Stay Safe: Always carve away from your hands and body – no one wants to mix red with their ink unless it’s intentional.
- Angle Matters: Hold your carving tool at a slight angle to avoid digging too deep – a bit like being on the edge in suspense movies, but less dramatic.
- Dance with Curves: To create circles and curves, rotate the block instead of trying to turn your hand – think of it as a waltz with your lino block.
- Experiment: Try different tools for unique shapes. Want a triangle? V-tool it. Dots? U-shape them (My Art Shop).
The satisfying part of this craft is watching your unique style unfold, much like a plot twist in a gripping novel.
Inking and Printing Instructions
Ah, inking and printing – where the real magic happens.
Inking Your Lino Block
- Prep the Ink: Use a plexiglass sheet to roll out your ink until it’s tacky and even.
- Ink the Block: Roll the ink onto the lino block with a brayer, ensuring an even coat for a consistent print.
- Test Print: Always do a test print to see if there are areas that need more or less ink.
Printing Your Designs
Once inked, gently press the block onto paper using a baren or spoon for even pressure. Lift carefully – voilà! You’ve created your masterpiece. And never forget, professional artists often destroy their blocks after a limited edition print run to maintain the uniqueness of their work (Gathered).
By embracing these techniques and tools, your lino prints can achieve the allure of masterpieces seen from legends like MC Escher, Matisse, and Picasso. Dive into the journey, get your hands linocut-dirty, and remember, your creative process is what makes your art sing.