Introduction to Artboard Oil Mediums
Artboard oil mediums are the secret sauce for artists looking to elevate their oil paintings from drab to fab. Whether they want to add sheen, speed up drying times, or manipulate the texture, there’s an oil medium for every situation. This section serves as a primer for anyone curious about these magic potions.
Exploring Oil Mediums for Artists
For the uninitiated, diving into the world of oil mediums can feel like wandering through a maze. But fear not! Here, they will find a variety of mediums and solvents that can help achieve different painting effects.
From thinning paint to adding gloss, the choices abound. Users can explore various oils, varnishes, and solvents from renowned brands like Artboard, Lukas, Winsor and Newton, Daler Rowney, and Maimeri (MyArtShop).
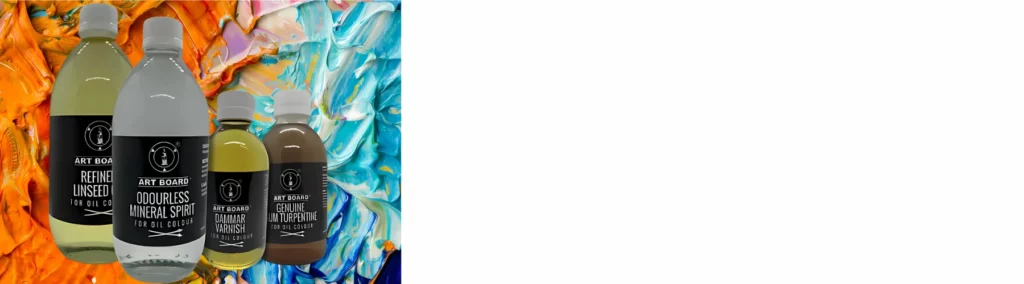
Key Types of Artboard Oil Mediums:
- Gum Turpentine:
- Traditional choice.
- Effective in thinning paint.
- Used for cleaning brushes.
- Strong smell, so ensure ventilation.
- Linseed Oil:
- Increases paint flow.
- Adds durability and gloss.
- Slows down drying time, ideal for blending.
- Mineral Spirits:
- Thinner for paint.
- Cleans brushes and palettes.
- Less pungent than turpentine, but still smells.
- Odourless Mineral Spirits:
- Same utility as mineral spirits.
- More friendly on the nose and the lungs.
- Favored for indoor use (Sadie Valeri Atelier).
- Gel Painting Mediums:
- Adds body to paint.
- Creates textures and retains brush strokes.
- Perfect for impasto techniques.
Different mediums serve different purposes, and the choice really depends on the artist’s intent. Adding mediums like glaze or alkyd mediums can increase the flow of paint, while wax or gel mediums can add body (Jackson’s Art Blog).
| Oil Medium | Primary Use | Effect | Additional Info |
|---|---|---|---|
| Gum Turpentine | Thinning, Cleaning | Quick evaporation | Traditional, strong odor |
| Linseed Oil | Increasing flow, Gloss | Slows drying | Durable finish, common |
| Mineral Spirits | Thinning, Cleaning | Less toxic than turpentine | Mid-range smell level |
| Odourless Mineral Spirits | Thinning, Cleaning | Reduced fumes | Ideal for indoor |
| Gel Mediums | Adding texture | Retains brush strokes | Great for impasto |
In summary, selecting the right artboard oil mediums can transform the painting experience. Whether one is a novice or a seasoned artist, using these mediums effectively can make a world of difference.
Types of Artboard Oil Mediums
When diving into the world of artboard oil mediums, there are a variety of options available to artists. Understanding each type can help you navigate through the bewildering array of choices and find the perfect medium for your masterpiece. Let’s get into the nitty-gritty of the most popular oil mediums and solvents!
Gum Turpentine and Its Uses
Gum turpentine is a classic choice among artists. Derived from the resin of pine trees, it is used primarily as a solvent and paint thinner. It’s great for speeding up drying times and cleaning brushes. Many brands, including Artboard, Lukas, Winsor & Newton, and Maimeri, offer high-quality turpentines (MyArtShop). It’s important to use turpentine in a well-ventilated area to avoid sniffing your way to an unplanned nap.
Linseed Oil in Oil Painting
Linseed oil is probably the granddaddy of oil mediums. It’s the most preferred medium for diluting oil paint due to its ability to cure to a strong, stable film. However, it can cause yellowing in paintings left in the dark, which can be reversed upon exposure to light (Sadie Valeri Atelier). For artists working with whites or pale colors, safflower, walnut, or poppy oils are recommended as they tend to yellow less (Anna Bregman Portraits).
Mineral Spirits and Their Applications
Mineral spirits, another staple in the artist’s toolkit, are traditionally used to thin oil paint and clean brushes. Whether you’re in an art studio or working at home, opting for lower odour alternatives can make your environment much more pleasant.
| Solvent | Traditional Use | Safety |
|---|---|---|
| Turpentine | Thinning paint, cleaning brushes | Needs ventilation |
| Mineral Spirits | Thinning paint, cleaning brushes | Reduced fumes |
Odourless Mineral Spirits: A Safer Alternative
For those conscious of health and safety, odourless mineral spirits are a wonderful alternative. These spirits can thin paint, clean brushes, and wipe off layers while emitting less fumes, making them a safer choice for long painting sessions (Wallack’s Art Supplies & Framing). Remember, even though they’re safer, always use them in a well-ventilated area to keep your breathing apparatus in tip-top shape.
Gel Painting Mediums for Textural Effects
Gel painting mediums are perfect for artists looking to add body to their paint and achieve textural effects. These mediums can add gloss, speed up drying time, and provide a more controlled application of paint. Brands such as Artboard offer a variety of gel mediums to meet your artistic needs. Great for those who want to channel their inner Van Gogh, without the ear incident, of course.
In summary, understanding the types of artboard oil mediums available can make your painting process more enjoyable and effective. Whether you’re a fan of the traditional gum turpentine, prefer the reliable linseed oil, or need the low-odour convenience of mineral spirits and gel mediums, there’s an option out there to suit your artistic style.
Understanding Oil-Based Varnishes
When delving into the mysterious and sometimes maddening world of artboard oil mediums, one cannot overlook the importance of oil-based varnishes. These varnishes not only protect your masterpiece but can also enhance its vibrancy and longevity. Let’s dive into the delightful chaos of Dammar varnish.
Dammar Varnish in Oil Painting
Dammar varnish is like the Swiss Army knife of the oil painting world. This versatile medium has several key uses, including serving as a glazing medium, a final varnish, and a retouch varnish. It can also improve adhesion and “oil out” those frustrating sunken-in areas of a painting.
| Use Case | Description |
|---|---|
| Glazing Medium | Enhances colour depth and luminosity when applied in thin layers. |
| Final Varnish | Provides a protective, glossy finish to keep your artwork looking fresh. |
| Retouch Varnish | Temporarily restores gloss to sunken-in areas, helping to unify the overall appearance. |
But not all that glitters is gold. Dammar has its quirks. If mixed directly into paint layers, it can cause yellowing or alter the paint’s integrity over time (Sadie Valeri Atelier). Additionally, some painters have reported compatibility issues when using Dammar with other mediums like spike oil or Liquin.
Pros of Dammar Varnish:
- Excellent for glazing and creating depth.
- Provides a protective finish.
- Enhances vibrancy and uniformity.
Cons of Dammar Varnish:
- Can cause yellowing if mixed with paint layers.
- Compatibility issues with certain other mediums.
- Strong odour, which might not be every artist’s cup of tea.
Artists must also consider the drying time when selecting a varnish. Dammar varnish, being a natural resin, generally leans on the glossier side and can significantly impact the drying time of oil paints. Fat mediums (like those with high oil content) will extend drying times—ideal for blending techniques. In contrast, lean mediums (containing driers and solvents) achieve quicker drying times (Jackson’s Art Blog).
For artists considering the use of varnishes and other oil mediums, always perform a small test before slathering it all over your magnum opus. This helps ensure that the final look and compatibility meet your expectations—without any unwanted surprises.
Understanding how various mediums can alter the finish and drying process of your work is essential. Whether you’re aiming for a glossy, satin, or matte finish, knowing your tools will let you achieve the perfect result.
Application and Techniques
To master the mystical art of using artboard oil mediums, one must first learn the arcane secrets of effective application and the dark arts of mixing and layering. Fear not, intrepid artist, as we guide you through these ancient rites.
How to Use Oil Mediums Effectively
Understanding how to use oil mediums can vastly improve your artistry, by altering viscosity, surface finish, and drying times. (Painting Best Practices) Here’s how to wield these tools with precision:
Oil to Solvent Ratios
One must achieve balance. A precise concoction of oil and solvent yields a well-bound paint film. The use of one exclusively? Disaster. Aim to use a blend of oil and solvent, maintaining a maximum of 10-15% oil alone (WetCanvas):
| Combination | Oil (%) | Solvent (%) | Amount |
|---|---|---|---|
| Oil Alone | 10-15 | 0 | Minimal |
| Oil and Solvent | Variable | Variable | Up to 25-30% more than paint |
Apply Sparingly
Less is more. Excessive use of oil changes pigment-to-oil ratio, affecting consistency and final appearance. (Jackson’s Art Blog) Minimal use achieves desired effects.
Tips for Mixing and Layering
Layering is like peeling a magical onion—a complex, but rewarding journey. Here are tips for successfully mixing and layering your artboard oil mediums:
Mixing Mediums
Different mediums produce different effects. Here are some common mediums and their effects:
| Medium Type | Effect |
|---|---|
| Glaze Medium | Increases flow, gives a glossy finish |
| Alkyd Medium | Speeds up drying time |
| Wax Medium | Adds body, matting effect |
| Gel Medium | Engender textural effects |
Layering Techniques
- Fat Over Lean: Start with lean (less oil) and build to fat (more oil). This ensures stability and prevents cracking.
- Vary Medium Quantities: Create contrasting glossy and matte areas by varying the medium quantities used—not just for alchemy lovers but also for effect seekers (Jackson’s Art Blog).
- Drying Times: Observe drying times attentively. This not only evades sticky fingers but ensures each layer sets perfectly.
Remember, the keen artist never dives without checking the waters. Merge these mystical tips with your creativity, and your art shall flourish.