Polymer Clay Creativity Techniques
Unleashing Creativity with Polymer Clay
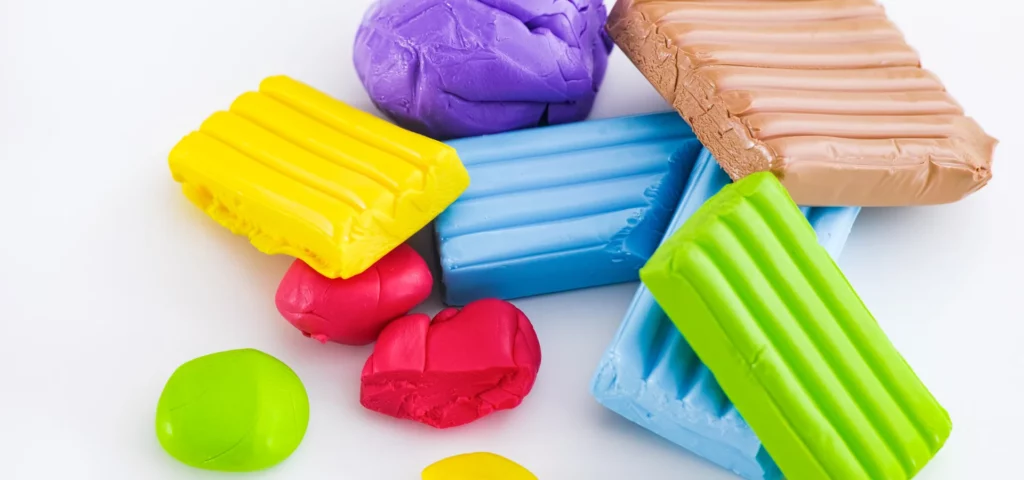
Are you ready to embark on an artistic adventure that will make your creative juices flow like a river on a rainy day? Polymer clay is your perfect travel buddy! With its versatility, you can create anything from elaborate jewellery to whimsical home decor. Let’s dive into some funky polymer clay techniques that will make your projects stand out.
Here are 13 techniques that you can’t miss:
- Conditioning: Like a good stretch before a marathon, conditioning your clay helps prevent cracking.
- Marbling: A little twist here, a little blend there, and voilà! You’ve got a masterpiece.
- Gold Leaf Application: Because who doesn’t love a little bling?
- Stamping: Make an impression, literally.
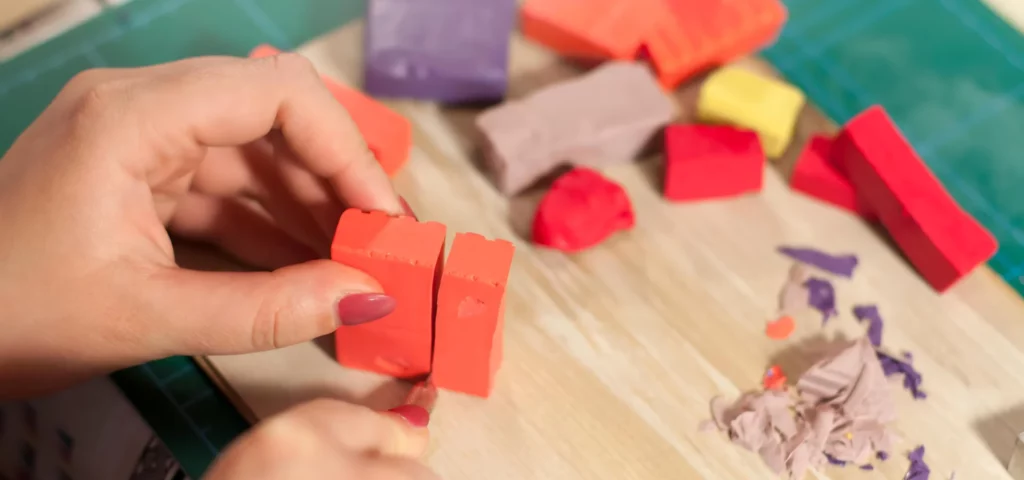
- Clay Caning: More on this below.
- Texturing: Add some feel-good vibes to your projects.
- Transferring Images: Bring digital to the physical world.
- Mixing Colours: Channel your inner van Gogh.
- Skinner Blending: For those gradient aficionados.
- Varnishing: Add the final touch of perfection.
- Embossing: Raise your art to the next level.
- Extruding Clay: Tubular, dude!
- Sculpting: Go ahead, play Michelangelo.
Explore more on selecting the best tools for these techniques in our polymer clay tools and supplies.
Mastering Polymer Clay Canes
Ah, the enigmatic polymer clay canes! Think of them as the Swiss Army knife in the toolkit of a polymer artist. They are immensely versatile and fun to create. From intricate floral designs to geometric patterns, canes can be sliced and diced to decorate a myriad of artistic projects.
| Step | Description |
|---|---|
| 1 | Design Your Cane: Start with a basic sketch. Simple shapes work best for beginners. |
| 2 | Colour Selection: Choose your clay colours. A palette knife can be useful here. |
| 3 | Form Basic Shapes: Roll your clay into logs, cubes, or sheets. Think of it as building with Lego bricks, but squishier. |
| 4 | Assemble the Cane: Combine your shapes into the pattern you sketched. This is where the magic happens. |
| 5 | Compress & Reduce: Roll and stretch your cane to condense the pattern. A bit like making pasta, but not as tasty. |
| 6 | Chill Out: Place your cane in the fridge for about 30 minutes to make slicing easier. |
| 7 | Slice & Use: Slice thin sections to adorn your jewellery, decor, or just to marvel at your own genius. |
Polymer clay canes can be used in various projects, from elegant earrings to chic home decor items. They’re perfect for those who love intricate designs and want to enjoy an endless array of pattern possibilities.
Flower Cane Example
To give you a more concrete idea:
| Flower Cane Steps | Materials Needed |
|---|---|
| Petals: Roll individual colours into small logs. | Fimo, Premo, or Kato clay |
| Stem: A cylinder of green clay. | Clay roller |
| Assembly: Arrange petal logs around a smaller centre log. | Palette knife |
| Compress: Gently squeeze to reduce the diameter. | Chilling method as described |
Embrace the endless creative possibilities with Fimo’s professional quality clay, which allows for intricate designs and professional finishes.
Explore more about the best polymer clay brands and elevate your artistic journey into the realm of funky polymer clay techniques.
Whether you’re stamping, texturing, or sculpting, polymer clay offers unlimited opportunities to express your creativity. Get your hands dirty and let your imagination run wild!
Exploring Types of Polymer Clays
When it comes to polymer clay techniques, the type of clay you use can make all the difference. Let’s dive into some classic showdowns to help you pick your ultimate clay champion.
Original Sculpey vs. Sculpey III
Original Sculpey and Sculpey III are both popular choices for beginners and seasoned artists alike. However, they offer distinct characteristics that cater to different artistic needs.
| Original Sculpey | Sculpey III | |
|---|---|---|
| Softness | Soft and pliable | Softer than Original Sculpey |
| Durability | Less durable, more prone to breakage | More durable, less brittle |
| Finish | Matte | Matte finish with a slight sheen |
| Ideal Use | Sculpting and larger projects | Detailed work and smaller projects |
| Baking Temperature | 130°C (275°F) | 130°C (275°F) |
Original Sculpey is great for bulk projects and sculpting large items, owing to its affordability and ease of use. However, it is less durable than Sculpey III, which is softer and better suited for detailed work.
Premo! Sculpey vs. Fimo
Premo! Sculpey and Fimo are top contenders among polymer clays, each offering unique properties that appeal to different artistic preferences.
| Premo! Sculpey | Fimo | |
|---|---|---|
| Softness | Soft and flexible | Firm and suitable for detailed work |
| Durability | Highly durable | Very durable |
| Color Range | Wide range of vibrant colors | Extensive color palette |
| Ideal Use | Flexible and durable projects | Intricate and highly detailed projects |
| Baking Temperature | 130°C (275°F) | 110°C (230°F) |
When selecting the right polymer clay for your project, it’s essential to consider the specific needs and goals of your artistic venture. Both Premo! Sculpey and Fimo offer distinct advantages, and experimenting with these clays can help you find the perfect fit for your creative journey. For more information on polymer clay tools and supplies, check out our detailed guide.
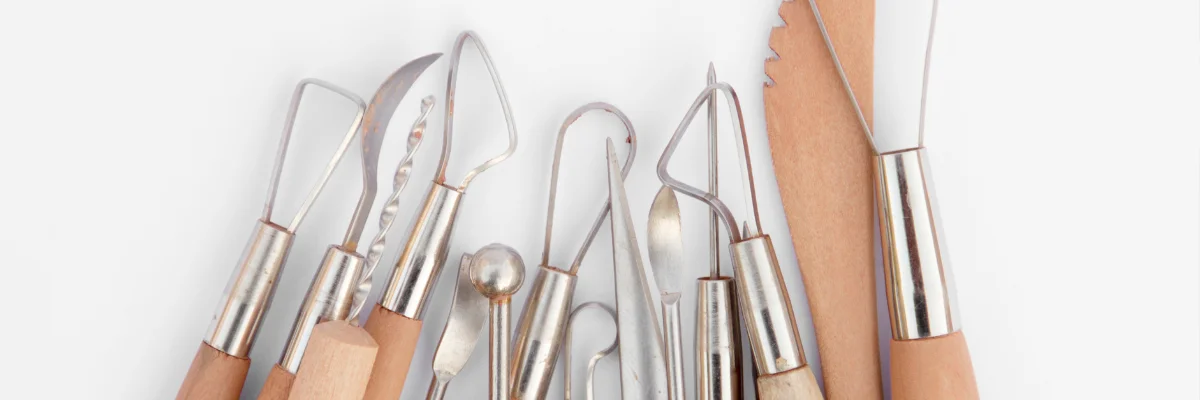
Essential Tools for Polymer Clay
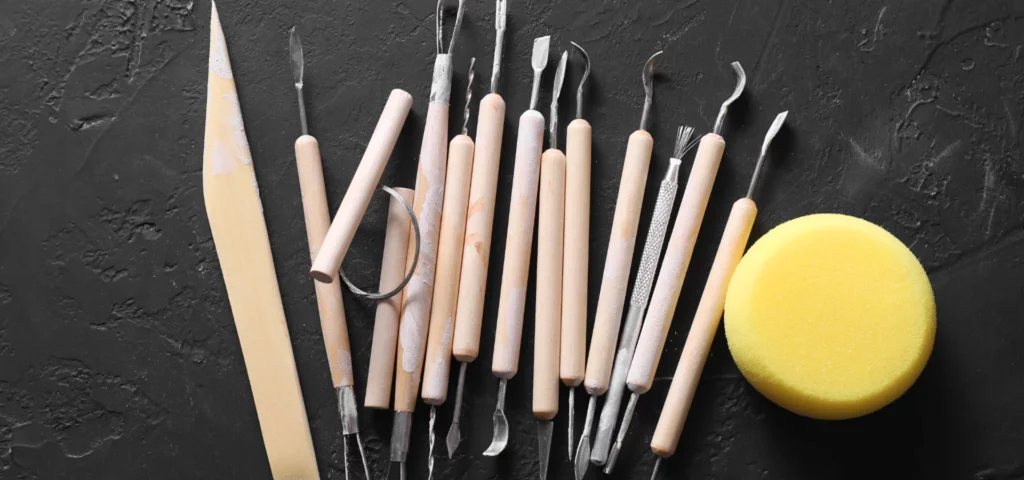
Polymer clay enthusiasts, behold! Your creative adventures with polymer clay rely heavily on the tools you wield. Let’s delve into the wonderful world of essential tools, featuring the Mont Marte Clay Tool Set and an overview of the diverse categories of tools available for your crafting delight.
Mont Marte Clay Tool Set
The Mont Marte Clay Tool Set 11 piece is nothing short of a wizard’s wand set for polymer clay aficionados. This remarkable set boasts a variety of tools perfectly suited for polymer clay work, each crafted with clear varnished hardwood handles and durable steel blades.
Mont Marte Clay Tool Set Includes:
- Needle tool
- Scraper
- Ribbon shaper
- Loop tool
- Smoothing tool
| Tool | Primary Use | Durability |
|---|---|---|
| Needle Tool | Detail work | High |
| Scraper | Smoothing surfaces | High |
| Ribbon Shaper | Carving | High |
| Loop Tool | Sculpting | High |
| Smoothing Tool | Flattening | High |
This set offers endless possibilities for your artistic endeavours. Ideal for polymer clay techniques, these tools will make your creations pop and shine like never before. Go ahead, unleash your inner sculptor and make your clay dreams come alive!
Clay Tools Category Overview
Embarking on a creative journey with polymer clay also means exploring a myriad of tools available. Here’s a quick overview of various types of tools that can make your polymer clay adventures even more exciting:
- Cutting Tools
- Knives, blades, and scissors
- Vital for precise cuts and shaping
- Smoothing Tools
- Rollers and brayers
- Excellent for flattening clay and eliminating air bubbles
- Detailing Tools
- Needle tools, dental picks
- Perfect for adding intricate details and textures
- Shaping Tools
- Ball styluses, sculpting tools
- Ideal for creating curves, crevices, and contours
- Texturing Tools
- Stamps, texture plates
- Great for adding patterns and designs to your clay projects
| Tool Category | Example | Use |
|---|---|---|
| Cutting Tools | Craft blade | Precise cuts |
| Smoothing Tools | Roller | Flattening |
| Detailing Tools | Needle tool | Intricate details |
| Shaping Tools | Ball stylus | Curves and crevices |
| Texturing Tools | Texture plate | Adding patterns |
Selecting the right tools can make a massive difference in the quality and enjoyment of your polymer clay projects. From essential cutting implements to detailed texturing tools, the right equipment can turn a simple piece of clay into a masterpiece.
For more on choosing the right tools and supplies, check out our comprehensive guide on polymer clay tools and supplies. Time to get crafty and mould some marvels!
Tips and Tricks for Polymer Clay
Delving into the funky world of polymer clay techniques is an adventure filled with creativity, mishaps, and a bit of magic. With the right tips up your sleeves, you’ll avoid common pitfalls and achieve marvellous creations.
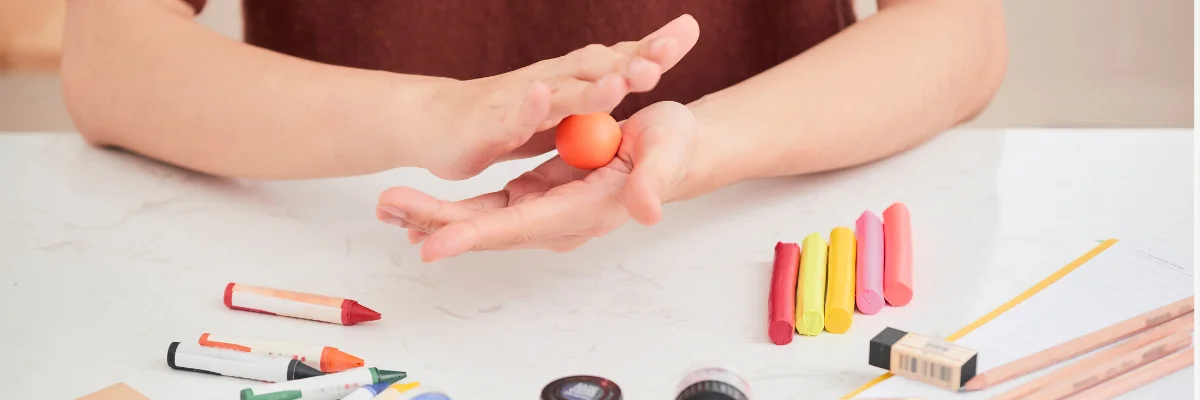
Preparing and Conditioning Clay
Before embarking on any polymer clay project, proper preparation and conditioning are essential steps. Here’s how to do it like a pro:
- Kneading the Clay: Start by warming up the clay in your hands. Knead it until it becomes soft and malleable. This process reduces the risk of cracks and ensures a smooth finish (Mont Marte).
- Using a Rolling Pin or Clay Press: For a smoother texture, use a rolling pin or clay press to condition the clay further. This helps in achieving an even thickness, making it easier to craft (Mont Marte).
- Avoid Water Exposure: Keep polymer clay away from water as it can make the clay brittle. Water exposure can affect the durability of your creations (Mont Marte). If pre-painting, ensure the clay is completely dry before proceeding.
Avoiding Common Mistakes
Creating with polymer clay can be a breeze if you steer clear of these common blunders:
- Mixing Different Clays: Don’t mix polymer clay with air dry clay, play dough or plasticine. They have different properties which can ruin your project (Mont Marte).
- Thickness Troubles: Shaping sculptures with aluminum foil can help avoid problems related to thickness. It makes the sculptures easier to bake evenly and prevents cracking (Mont Marte).
- Skipping Heat Protection: While conditioning, ensure the clay isn’t exposed to extreme temperatures as it can become harder to work with.
| Common Mistake | Solution |
|---|---|
| Mixing different clays | Use only compatible polymer clay |
| Incorrect thickness | Use aluminum foil for sculpting |
| Water exposure | Keep clay away from water |
By following these simple steps and tips, adventurers in polymer clay art can enhance their crafting skills and create masterpieces without a hitch. Happy moulding!
Crafting with Mont Marte Make n Bake Polymer Clay
Dive into the world of Mont Marte Make n Bake Polymer Clay and discover its versatility, vibrant characteristics, and the essential tools needed to create your next masterpiece.
Versatility and Characteristics
Mont Marte Make n Bake Polymer Clay is a jack-of-all-trades when it comes to creative projects. Whether you’re sculpting intricate figures, crafting dazzling jewellery, or just having a whimsical afternoon under the South African sun, this polymer clay has got you covered. A standout feature of this clay is its excellent ability to retain detail post-baking, exhibiting minimal shrinkage (My Art Shop).
Boasting a non-toxic formula, it ensures a worry-free crafting experience for artists of all ages. The clay cures to a hard, durable finish that keeps your creations looking sharp for years to come.
Throw in a brilliant palette of colours—think Titanium White, Rose Gold, Silver, Fluoro Yellow, and Fluoro Green—this clay offers boundless possibilities for colourful and imaginative projects. You can even grab a 10-Piece Set if you’re feeling especially adventurous (My Art Shop).
| Feature | Description |
|---|---|
| Detail Retention | Excellent |
| Shrinkage After Curing | Minimal |
| Toxicity | Non-toxic |
| Available Colors | Titanium White, Rose Gold, Silver, Fluoro Yellow, Fluoro Green, etc. |
| Ideal For | Jewelry, figurines, home décor |
Mont Marte Signature Sculpture Tool Set
For a truly professional finish, you’ll need the right tools. Enter the Mont Marte Signature Sculpture Tool Set, a collection of tools designed to complement your polymer clay experience. This 39-piece arsenal includes everything from a Flexible Knife Set to a Metal Handle Dala Sculpture Wire Brush, each aimed at helping you craft texture and detail like a pro (My Art Shop).
No matter your level of expertise, these tools transform your crafting sessions, making it easier to bring your vivid imagination to life. For a broader look at essential tools, visit our article on polymer clay tools and supplies.
| Tool | Purpose |
|---|---|
| Flexible Knife Set | Precision cutting and slicing |
| 6-Piece Tool Set | General sculpting and detailing |
| 39-Piece Tool Set | Comprehensive sculpting and modelling |
| Metal Handle Dala Sculpture Wire Brush | Adding texture |
With Mont Marte Make n Bake Polymer Clay and the right sculpting tools, your creative adventures are only limited by your imagination. Whether you’re a seasoned artist or just getting started, the vibrant colours and versatile tools make this clay a fantastic choice for all your artistic endeavours.