Selecting Quality Coloured Pencils
Choosing the right coloured pencils can elevate an artist’s work to new levels of vibrancy and detail. For those serious about their artwork, selecting professional artist coloured pencils is essential.
Features to Look For
Identifying the right coloured pencils isn’t just about picking the prettiest box (even though, let’s admit, packaging does matter!). Here are the key features to consider:
- Pigment Quality: Rich, vibrant colours with long-lasting saturation.
- Lightfastness: Resistance to fading when exposed to light over time.
- Core Material: Wax-based for blending or oil-based for durability.
- Durability: Break-resistant cores and sturdy casings.
- Blendability: Smooth layers and easy blending without smudging.
Invest in professional-grade coloured pencils like Prismacolor Premier, Caran d’Ache Pablo and Luminance, and Derwent Lightfast for high-quality results (Veronica’s Art).
Brand Comparison
Here’s a look at some of the top brands and what sets them apart in the world of professional artist coloured pencils:
| Brand | Main Features | Notable Characteristics |
|---|---|---|
| Faber-Castell Polychromos | Oil and wax combo, break-resistant lead | Suitable for fine details, keeps a sharp point well |
| Derwent Coloursoft | Wax-based, easy to blend | Comparable to Prismacolor Premier, vivid colours |
| Caran d’Ache Luminance | Soft core, high lightfastness | Wide range of 100 colours, smooth blendability |
| Prismacolor Premier | Soft, wax-based core | Excellent for blending and layering, vibrant pigments |
| Derwent Lightfast | High lightfastness, oil-based | Smooth application, sturdy and durable |
Check out the citings for detailed insights (Sarah Renae Clark, The Art Gear Guide).
These brands offer a spectrum of features catering to varying artistic needs, allowing both beginners and seasoned artists to find their perfect match. For artists who are particular about Creating Texture, ensuring they select pencils that facilitate layer building and burnishing is essential.
And remember, just as a chef is only as good as their knives, an artist is only as good as their coloured pencils. Happy drawing!
Premium Artist Coloured Pencils
When it comes to professional artist coloured pencils, a bit of flair and precision can make all the difference in your artwork. Let’s delve into the wonders of three top-notch pencil sets that will make your inner artist do a happy dance.
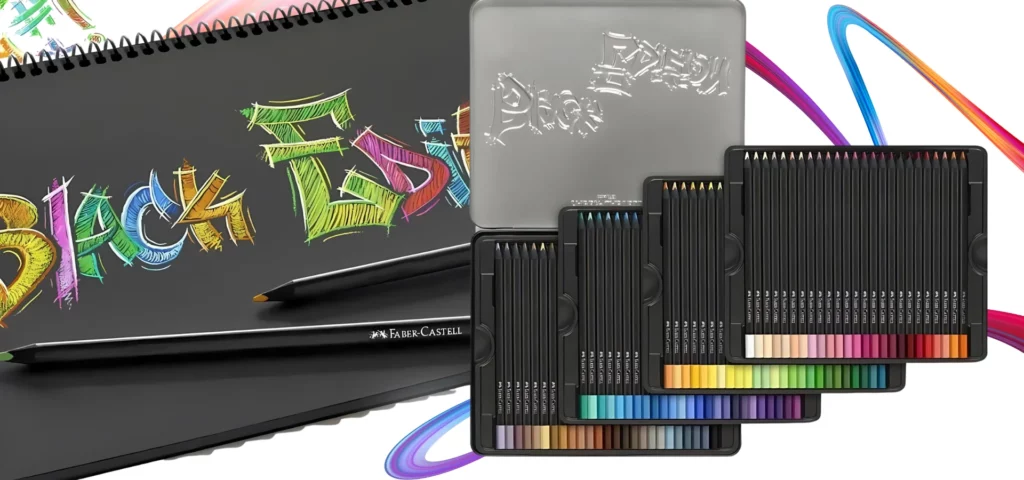
Faber Castell BLACK Edition

The Faber Castell BLACK Edition Colour Pencils promise a vibrant and soft colour laydown that makes your paper sing. Thanks to their super soft lead and high pigmentation, they’re perfect for dancing across light, coloured, and dark paper. The ergonomic triangular shape of these pencils ensures that your grip is always spot on, providing ultimate comfort during your artistic escapades (My Art Shop).
| Feature | Description |
|---|---|
| Lead Softness | Super Soft |
| Pigmentation | High |
| Shape | Triangular |
| Paper Suitability | Light, Coloured, Dark |
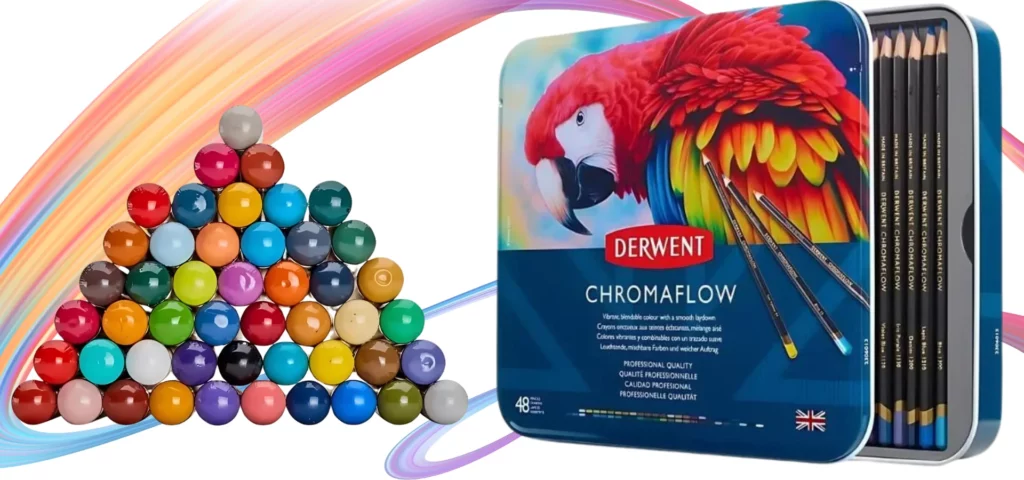
Derwent Chromaflow Pencils

The Derwent Chromaflow Pencils offer a stunning array of pigments that will make your palette envious. They are soft colour pencils formulated with high quality pigments, for striking vibrancy that stands out, even on dark paper. The soft core of Derwent Chromaflow pencils delivers a velvety, rapid laydown, covering the page with vivid colour. The artist quality, slimline core handles pressure, allow for easy layering and shading. Making it a splendid addition to your artistic arsenal (My Art Shop).
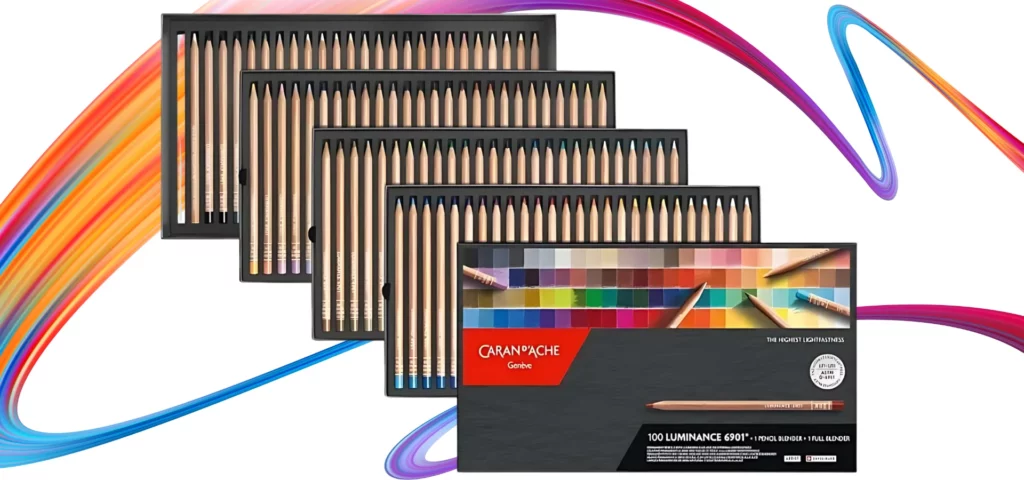
Caran D’Ache Luminance 6901

For those seeking the crème de la crème, the Caran D’Ache Luminance 6901 Coloured Pencils are the way to go. These little wonders are tailor-made for works destined for exhibitions, collections, and museums. They offer a velvety touch and open up possibilities for overlaying, mixed techniques, and gradations. Their superpower? An extraordinary level of lightfastness, certified by international ASTM D-6901 standards. These pencils undergo rigorous testing, including 3 months in the Arizona desert and 400 hours of intense UV radiation. Truly, they’re the knights in shining armour of the coloured pencil world (My Art Shop).
In conclusion, these three sets of professional artist coloured pencils – Faber Castell BLACK Edition, Derwent Chromaflow Pencils, and Caran D’Ache Luminance 6901 – each offer unique advantages. Whether you’re looking for vibrant pigmentation, a wide range of colours, or unparalleled lightfastness, there’s something for every artist to explore and enjoy.
Exploring Colour Variety
An artist’s world is a kaleidoscope of colours, and selecting the right palette is as important as choosing the right canvas. This section dives into the colourful realm of professional artist coloured pencils, guiding you through the range of colours and unique palettes available.
Range of Colours
The vibrant world of professional artist coloured pencils offers an extensive range of hues to unleash one’s creativity. Each brand brings its own rainbow to the table, and here’s a sneak peek of some notable options:
Derwent Chromaflow pencils boast an impressive collection of colours, including the elegantly named ‘Parmesan’. Meanwhile, Caran D’Ache Luminance 6901 pencils are favored for their vibrant, blendable hues, ideal for portraits and realistic skin tones (Sarah Renae Clark). Faber Castell BLACK Edition pencils provide a punchy contrast against dark papers, making them a standout choice.
Unique Colour Palettes
Beyond the primary spectrum, some coloured pencil sets offer unique palettes, tailored to specific artistic needs. Let’s journey through some of these extraordinary selections:
- Caran D’Ache Luminance 6901: Manufactured in Switzerland since 1915, Caran D’Ache pencils offer Swiss-made quality and precision. The Luminance 6901 range combines wax and oil for a smooth, vibrantly coloured finish (Caran d’Ache).
- Derwent Lightfast Pencils: The first oil-based pencils from Derwent are known for their lightfastness, ensuring colours that won’t fade under museum conditions for up to 100 years (Sarah Renae Clark).
- Derwent Coloursoft Pencils: These wax-based pencils are known for their soft, creamy texture and excellent blendability, often compared to Prismacolor Premier pencils (Sarah Renae Clark).
Choosing the right palette is akin to selecting the best tools for a masterpiece. Whether it’s the Parmesan hue of Derwent Chromaflow or the deep richness of Faber Castell BLACK Edition, there’s a spectrum to suit every creative soul. To explore more techniques and tips for blending these colours seamlessly, don’t miss our section on blending and layering.
Professional Techniques & Tips
Creating stunning artwork with professional artist coloured pencils requires more than just fancy materials. Here we dive into key techniques that elevate those humble pencil strokes to masterpieces.
Blending & Layering
Blending and layering are essential techniques for achieving depth and smooth transitions in your artwork. Unlike blending your morning smoothie, this requires a little finesse.
Blending Techniques:
- Burnishing: This involves pressing hard on the pencil to create a smooth, shiny surface. Think of it as the elbow grease of the coloured pencil world. Caran d’Ache’s Luminance 6901 pencils are particularly good for this due to their creamy consistency (Veronica’s Art).
- Solvents: Use solvents like odourless mineral spirits or rubbing alcohol to break down the pigments and blend them together. A word of caution: don’t go dousing your paper like it’s on fire. Moderation is key.
Layering Techniques:
Layering is akin to making a lasagna but with colours. It involves applying multiple layers to build up depth and richness.
- Light to Dark: Start with lighter shades and gradually work up to the darker hues. This prevents the dreaded muddiness.
- Cross-Hatching: Use cross-hatching for a more gradual build-up of colour. This is particularly useful when transitioning between hues.
| Technique | Tools Required | Best For |
|---|---|---|
| Burnishing | Luminance 6901 Pencils | Smooth, shiny finish |
| Solvents | Alcohol, Mineral Spirits | Blending pigments easily |
| Light to Dark | Softness of Pencil | Layer control |
| Cross-Hatching | Sharp Pencils | Gradual colour transitions |
Creating Texture
If blending and layering are the foundation, creating texture is the cherry on top. Good texture can make your drawings pop, giving them life and realism.
Techniques for Texture:
- Scumbling: This involves using small, circular strokes to build up layers of colour. It’s perfect for creating textured surfaces like fur or grass. If Van Gogh did coloured pencils, he’d scumble.
- Stippling: Create layers of tiny dots to form textures. Imagine you’re a pointillist artist, but with coloured pencils. Your patience will be tested, but the result is worth it.
- Directional Lines: Follow the natural lines of your subject to create realistic textures, whether it’s the wave of hair or the flow of fabric.
Advanced Tips:
- Blades & Erasers: Use craft blades to gently scrape off layers for highlights or texture. Erasers can be used creatively to lighten areas or add fine details. Make sure your paper is durable— opt for something heavy like 300 gsm (Art is Fun).
- Different Pencils: Different brands offer varied textures. Derwent Chromaflow Pencils are fabulous for smooth, consistent application, while Faber Castell BLACK Edition pencils give richer textures (Veronica’s Art).
| Technique | Best For | Tools Required |
|---|---|---|
| Scumbling | Textured surfaces (e.g., fur) | Soft pencils |
| Stippling | Detailed textures | Sharp, durable pencils |
| Directional Lines | Realistic effects | Various pencil softness |
| Blades & Erasers | Highlights, fine details | Craft blades, erasers |
Master these techniques, and soon you’ll find that achieving vibrant, colour-drenched masterpieces is well within your grasp. Plus, you’ll finally have an answer for when someone asks, “How did you do that?”
Paper Selection for Coloured Pencils
Selecting the perfect paper to pair with your professional artist coloured pencils is an art in itself. Not all paper is created equal, and choosing the right texture and weight can make all the difference when you’re aiming for that masterpiece. Here’s your whimsical guide to mastering paper selection for your coloured pencil adventures.
Paper Texture
When it comes to texture, paper can be as picky as a gourmet chef. The texture you choose depends on your artistic style and preferences.
Smooth Texture (Hot Press, Plate, or Fine-Grain)
Smooth-textured paper is ideal for those who love detailed work and seamless blending. It provides a silky surface that allows your pencils to glide effortlessly, creating clean lines and subtle gradients.
Medium Texture (Cold Press or Vellum)
For artists who revel in layering or want a bit of tooth to catch the pigment, medium-textured paper offers the perfect balance. It has enough texture to hold multiple layers of colour while still allowing for smooth shading and blending.
Weight & Durability
Now, let’s talk about the importance of weight in your paper. When it comes to coloured pencils, paper weight is more than just a number—it’s the difference between sturdy satisfaction and flimsy frustration.
Heavyweight Paper
To prevent your creation from warping and buckling when using solvents or wet media, opt for heavyweight paper. A good benchmark is paper that is at least 300 gsm (grams per square metre) or 140 lb (pounds). This type of paper can withstand rough techniques like burnishing and erasing without throwing a tantrum.
Archival Quality
If you’re planning on your masterpiece lasting longer than the latest social media trend, go for acid-free and fully archival paper. Such paper is made from 100% cotton, ensuring your vibrant colours won’t yellow or turn brittle over time (Art is Fun).
Remember, even the best professional artist coloured pencils need quality paper to bring out their true potential. For those who are always on the move, sketchbooks with decent quality paper are handy, but for more serious work, consider single sheets or tape-bound pads to test different brands.
Dive into the world of textured and weighted papers, and you’ll find that the right choice can elevate your artistic experience to new heights.
Mastering Coloured Pencil Artwork
Mastering the art of coloured pencils requires a combination of understanding colour harmony and utilising the right tools and techniques. Let’s delve into how you can elevate your artwork to professional levels with these essential tips.
Colour Harmony
Creating stunning artwork with professional artist coloured pencils involves a keen understanding of colour harmony. An artist’s palette can often resemble a rainbow explosion, but knowing how to blend those colours cohesively is crucial.
The Basics of Colour Harmony
- Use a Colour Wheel: The colour wheel is your best mate. It helps predict how colours will mix and complements each other.
- Limit Your Palette: According to Veronica’s Art, limiting your coloured pencil choices to 15-20 colors can provide better contrast and prevent your artwork from becoming too muddled.
- Value Matters: Understanding the importance of light, colour, and values is essential in creating realistic drawings. Define highlights, darkest darks, and midtones accurately.
| Colour Harmony Tips | Description |
|---|---|
| Colour Wheel Usage | Predicts how colours mix |
| Limited Palette | Ensures better contrast |
| Understand Values | Define highlights, darks, and midtones |
By mastering these basics, artists will find it easier to create pieces where colours dance together harmoniously rather than fighting for attention.
Tools & Techniques
Even the finest artist coloured pencils can become a nightmare without the proper techniques and tools. Here are the must-know tips for making your coloured pencil artwork pop.
Essential Tools
- High-quality Pencils: Select pencils like Caran d’Ache Luminance, which blend effortlessly and have a high lightfast rating. As mentioned in The Art Gear Guide, almost 61 of their 100 colours are LF1-rated.
- Proper Paper: Invest in the right paper. Heavyweight paper with a bit of tooth allows for layering and blending without the “crumblies”.
- Blenders & Burnishers: These tools help in smoothing out your pencil strokes, making your artwork look professional.
Techniques for Vibrant Results
- Blending & Layering: Begin with a light hand and build up layers gradually. This technique not only adds depth but also enhances colour vibrancy.
- Creating Texture: Vary your pencil strokes – cross-hatching, stippling, and circling can add intricate textures to your drawings.
- Protecting Your Artwork: Use a fixative spray to secure your finished piece, preserving the vibrant colours.
By incorporating these tools and techniques, artists can achieve the full potential of professional artist coloured pencils and produce artwork that dazzles.


